Thursday, 21 August 2014

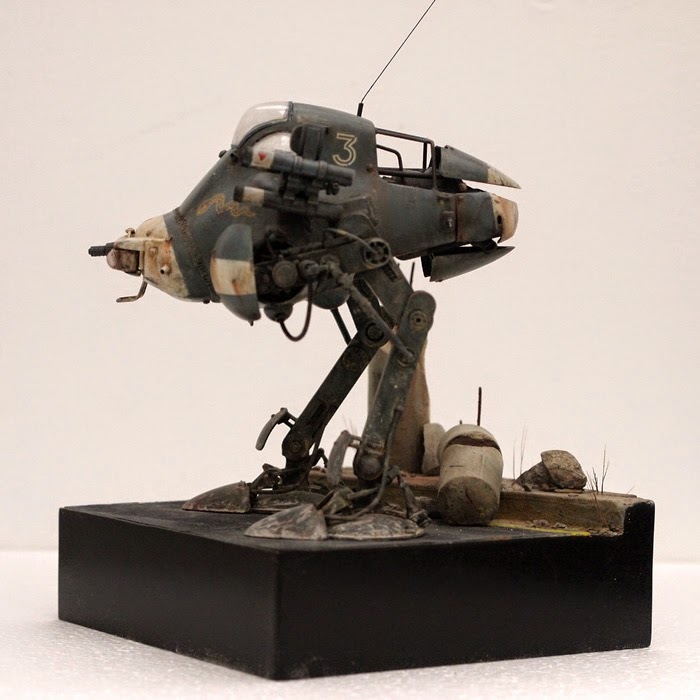
Friedrich ready for primer!

The build's done.
The joints were covered with Green Stuff added some final detail to the radome thingy.
Now it will get disassembled to get be readied for primer and than paint...

That's all for now.


Friday, 15 August 2014

Friedrich more modding


I've started thinking of the Friedrich as kind of a forward recon (like Kiowa and Apache Helicopters work together, Friedrich and Küster could do the same)... anyway, I thought the suit needed some kind of radar unit.
So I scratched one.

Here are some pics.
This is where I hit the "it will look ok after paint" moment for the first time. Usually happens a couple of times with every build for me... "will fix it in paint" followed by "will fix it with weathering" then "will fix it in washes and pigments".  ;D

I'm thinking a more bulbous radar unit would be more in line with the Ma.K. style, but then it will get very tall. It's all SG-d tight now anyway (still needs some detailing at the base where the unit goes into the suit)
Have a look; let me know what you think.


Saturday, 9 August 2014

Friedrich Moderate Modding

Hi there,
A quick update on the Friedrich...

In the previous Friedrich build report I posted some pics of where I had puttied the side windows over.
That worked pretty well, but I thought it might get a little boring... so I came up with the idea of trying to fit in the steel window cover that came with the Super Jerry kit as part of the Gigant Floh optional build.

And is it turned out the fit the curve of the Friedrich hull pretty well. Just had to make some room for the shoulder and sand off the inside portal viewing thingy.  I just took the Dremel to it. Done in a flash.

I put weld seams around it using 0.5 mm styrene bar (is it still bar at the thickness? more like wire), glued it around and softened it with Tamiya Extra Thin and used a soldering chisel [looking thing] to push in the texture.

After that I added a "cast steel" texture with Mr. Surfacer 1000.

That's all for now.


Friday, 8 August 2014

Super Jerry Base Finished

So well the base for the Super Jerry is done, cutting the WIP a little short, but I was on a roll putting the paint, washes and pigments on the thing that I didn't want to pause to set the thing up for pics...

Anyway. I glued all the concrete debris on with white glue and gave it all a base coat of Tamiya Buff colour after the glue had dried. Also added some little rocks here and there.

Than I gave the cracks in the pavement a quick pin wash using the black ready made wash by Vallejo. Then I added some streaking and washes with a "European Dirt" of the same brand.
Also added some oil streaking particularly the rust effects and when that had dried a mix of light gray and light (very light) moss-green pigments.

After that I glued in the grass which I made from the hairs from an old paint brush (pig's hair I think). I used super glue to glue them into little tufts and then, after giving them a quick hint of drab green, used PVA (white) glue to stick then into the crack and holes in the pavement.

Than put the model on the base using copper rods, which were SG'ed into the feet and then gave the whole thing another treatment with pigments to blend  it all together a little...

Hope you like the result.

Cheers!


Friday, 25 July 2014

Super Jerry Base

A few months ago I finished work on a Super Jerry and it's been just standing there.. so I decided to build it a base.
I wanted it to be an urban environment as I think it suits the paint scheme. I also wanted to keep it kind of simple as the thing itself is busy looking enough...

Anyway here the breakdown so far:
First I build up the core by glueing polystyrene sheets on a piece of chipboard of 15cm square using wood glue.
The tiles on the sidewalk are 2mm thing pieces and the broken pillar is a piece of street chalk I stole from my 4 year old, snapped it in half and drilled some holes into them piece for the 1mm copper wire to go through. This is a dry-fit.


For the tarmac I used a piece of cracked and torn 80 grit sandpaper, also glued in place using wood glue (white glue basically).
I then built up the sides with 1.5 mm thick styrene plate (plaplate to some).


Sprayed it with gray Tamiya primer:


After then putting a few layers of Tamiya black on the sides and covering that with glossy clear coat, I masked the sides off.
I then put a coat of black primer on the top. Not that it needed more primer but I still have a can of Vallejo primer I'm using as paint because as primer I really don't like it... better use it I thought.


 Then I put a little dark gray on the tarmac from a can of Tamiya German grey I had left.. just a light dusting. Also airbrushed the sidewalk and the pillar and some debris.
After I painted the stripe on the tarmac I glued all the pieces in place with white glue and added some small rocks and a little sand here and there.


 Here's how the Jerry will stand on the thing.


Next up there's more painting of details. Some washes, streaking/water marks/dirt and some pigments... stay tuned.

Cheers!