Saturday, 14 June 2014

Auricom Griffon Base Restart...


After looking at this thing for a while I realized, I needed to soalve the problem of the model twisting on the base...
I got a tip on one of the forums I frequent about using square tube to attach the model to the base (feeling stupid for not thinking of that myself)... I decided to double back a little bit and ready some of the base. 

I ripped out most of the polystyrene sheets and put in a square bit of styrene tube. I found some metal bar (i think it's pyrite) that fits it perfectly. I attached the tube into the base exactly like I had done with the round tube (using poly clay and plaster)..


In building up the further layers of polystyrene I glued in bits of plastic card that fit around the tube. So bits of card with square holes in them, glued to the tube with SG and to the polystyrene with wood glue (about the same as white glue I think).
This was done to make sure it wouldn't move under the weight of the model.


The bottom of the Griffon now had a gaping 4mm hole in it... so I made it bigger. Put in a piece of the same square tube that went all the way to the 'ceiling' inside the Griffon. Then I fixed it in place at the hole with SG and green stuff and on the inside by using a thin wooden stick to push a ball of GreenStuff all the way up into the tube and stick it to the ceiling on the inside of the tube... hope that makes sense. Anyway it's in there solid.

I put a little weld seem and some bolts on the tube end sticking out and painted it (also put some greebly on the top of previously failed attempts at fixing the model to the base)...


With that done I started putting some filler on the base. I used acrylic filler (which I think is basically thick unpigmented acrylic paint) and mixed it with cat litter.... a total experiment as I had never worked with the stuff. 
Well the cat litter absorbed a lot of moisture from the filler quite fast, making it quite difficult to spread out... it also shrank quite a bit as it dried. 

So, not really what I expected but really good to know (if I ever want to make a rocky dried up desert base..). 
I'll just cake on another layer of the filler mixed with something non-absorbent. Something that will give it a more asphalt structure too.


Then I did a quick dry-fit of the model on the base.. it looks like it just might work. 
Thanks for looking, let me know what you think!


Sunday, 1 June 2014

Auricom Griffon Base Build


Been working on the base. I had a design and based on that I drew a template, printed it out and used that to build a cardboard model... I had a pic of that but the SD card got corrupted (yes it does corrupt data when you just rip it out of your machine ahah).
Anyway here the template:


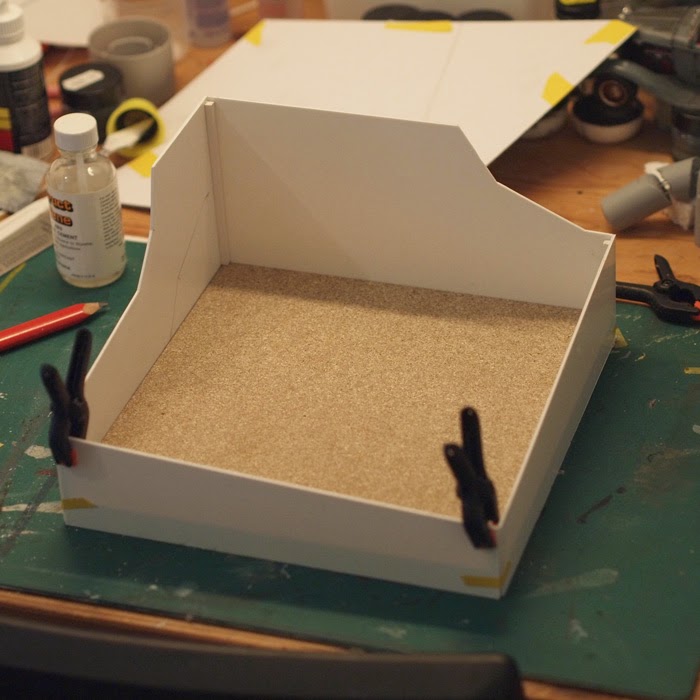
When I saw how that worked I used the cardboard to cut some 1.5 mm thick styrene sheet to size and built the walls around a pressed wood base (not sure what the english is for this type of wood product).


After this I started thinking about how I was going to fix the model to the base... I want it to hover over the base under an angle and that turned out to be a bit of a ball ache. The model is quite a bit heavier than I thought.
the first attempt was to drill and glue in two 2mm pieces of copper rod into the bottom, but that wasnt' strong enough and I couldn't secure them into the mainly styrofoam base... the second attempt was to get a long bit of threaded bar (4 mm thick) but that the nut I glued into the bottom of the model didn't hold. I used green stuff and SG but to no avail. beside it woul dhave cause problems when putting the model on the base I there most likely would not have been enough room for the thing to turn enough times to get it close enough to the base...

Anyway nou I've put in a piece of styrene tube (inner circumference of 4mm) and I'm going to glue in a piece transparent styrene rod into the model and then when the base is finished but glue the rod into the tube... fingers crossed.

Cut out a square block out of the base layer of styrofoam. stuck it in place with a lump of milliput and filled in the hole with plaster. I will further secure it later by glueing a pieve of styrene sheet with a hole in it over the square hole (havein the tube stick through). 
Then I'll build up the rest of the base with more layers of styrofoam and fill up all the holes with that acrylic filler stuff

Lot of talk, not much to see.

More exciting posts later.


Sunday, 4 May 2014

Auricom Griffon Washes and Weathering


So with base paints and decals done it's time for the first wash. As ever I went with a sludge wash as I like to call them.

Anyway I gave the whole thing a couple of layers of clear coat. I used Vajelo Glossy acrylic out of a can. And I will never do this again. 
And here's why...

I started on the bottom of the craft. I figured that was going to be the dirtiest so I'd start there. But some of the goop went to the side of the craft and onto the decals... no problem I thought. The clear coat will protect it all, as always (that's why I put in on obviously).

Anyway, as I was cleaning off the goop I noticed the decals were getting damaged. It wasn't too bad as it looked nicely weathered (I did swear my head off)... it just wasn't what I wanted. I wanted to keep the custom decals more or less untouched, apart from the panel lines going through them.


I thought it weird, as I did think I put on a good coat of clear.. but I figured maybe I missed a spot...?

So I let this wash dry and just to be sure I gave it anoth couple of coats... I didn't want to make the clear coat too thick of course, but I didn't want to lose anymore decals. Anyway I soldiered on. 
The wash, by the way, was one consisting of a mix of lamp black, prussian blue, and sea green. I did the whole thing on parts starting with the bottom, then the cockpit and the the top of the arms (wings?)


BUT when working on one of the arms I damaged another of the decals (lots more swearing ensued), again damage was minor, sort of ok looking, but unwanted none the less... So two cans of Valejo clear coat (matt and gloss) in the bin. I should have known as I've also once had to bin a almost full can of Valejo primer for being useless... maybe it's me but I don't have any luck with many of their products it seems.


The thing that annoys me most is when you can't trust a product. I don't like these kinds of surprises, minor though they may be.
I've used Humbrol varnishes before, they were great. Guess I'm back to them.

How to procede... I think I might finish this one using more conventional techniques. I don't want to rub it to much more. 
I think I'll put a dark brown pin wash in the panel and rivet lines. And finish it off with a couple of lighter washes, at least one of which being a light brown/tan one. This thing shouldn't become too dirty anyway, only very minor rust marks here and there and some oils staining. 
That's the plan until something else goes wrong anyway ha.


Tuesday, 29 April 2014

Auricom Griffon Base Design

This thing will be going onto a base. I want it in flight, so I don't really have any other option that to build it a base.
This will my first ever base, so the build will most likely be a nightmare.

Anyway this is the design for it. Modeled after a WipeOut racetrack... a segment thereof.


Auricom Griffon Paint, Decals and Weathering


Finished the base painting and some minor scratching / weathering.
I planned on doing most of them using steel wool (by layering shades of the base and top coat of the craft with clear coats in between and then going back down into them with the steel wool...) This didn't really work, so I also added some painted on chips. Not as naturally random, but fun to do. They still look a little 'cartoony' in places now, but some thick washes will help push that back.

I managed to find a guy on the Maschinen Krueger forums, how was friendly enough to print me some custom decals for a small fee.

So those went on beautifully. They responded really well to the MicroSet en MicroSol I used to put them on.
They can have a couple more coats of MicroSol, but then it's good to go for a clear coat and on to washing and more weathering!

thanks for looking!