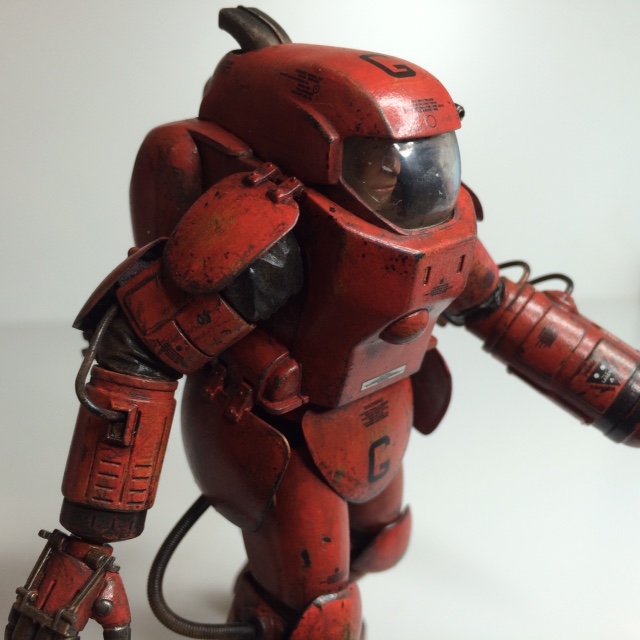
Wednesday, 13 July 2016

AG Chopper - big update part 1

Yes hi there... it's been a while. Again. I know, I know.

Been doing a lot of work on the Anti Gravity Chopper scratch build.
The build is pretty much done now and because of the way I've put it together (stupidly) I've also started painting some of the parts.

This will probably be the first post of a couple because it would be nonsense to smash it all into one.

Anyway let's see where we last left it...


Ah yes... Well this has developed. And mainly in the details department.

For instance the cockpit got a little more complete... with steering and oxygen for the pilot. Plus a bunch of other hoses and wiring.


The tail end got some much needed aero dynamic controls like a tail fin and a some wing type things. How would one ever expect this thing to fly otherwise...


I also changed the tail lights because the old ones made it look a little too 'paleo futuristic 50s'. I used some Gundam detailing part for this... Actually various Gundam detailing parts were used quite a lot. 


This is where the build started to come together pretty well and I though it time to start painting some of the parts that wouldn't be able to paint after assembly any way... firs the main generator. The MK6 Kaminari AG field generator... (yes I actually thought of a model name for my imaginary machine)...


The more observant of you... might notice the ventilation unit at the tope is different from what is was. Again I didn't like the old one. Too clunky. This one is better.

Also the propulsion jet got a paint job... all these only received minor weathering and washes because I'll do that at a later stage, when it's closer to complete. That way I can keep it more consistent overall.


Also the pilot and part of the cockpit got their first layers of paint...


At this stage the whole thing consisted of three separate pieces. The front end the bit that had the seat on it and the tail section. With parts of the cockpit painted I could glue together the seat part and the tail sections. It took a a lot of one-eyed looking to get it all aligned and straight (as was possible) but when glued it was good to now have two parts in stead of three...

Before I could fix the to parts together there was one detail I needed to change. In the picture above you can see wire coming out of the helmet going into the back of the head rest. I didn't want to fix the pilot to the chair yet, but I noticed I wouldn't be able to get those wires into that little holes after assembly. There simply wouldn't be enough room to maneuver.
So I dreamed up some device I fixed to this seat belt that would have those wires go in and a bigger on come out which goes into the side of the chair under the seat... problem solved without loss of wiring (I love the look of wiring).


Parts were cleared for bonding. And of course I added more details too... a process which seems continuous by this point.


So that's it for this update... will be continued shortly in part 2...


Saturday, 2 April 2016

New Rally Pawn and Camel team finished

Well that's that.
After a few more oil stains and a dusting of pigments I'm declaring this team finished...

Cheers,
Martijn


Tuesday, 29 March 2016

New Rally Pawn and Camel... the dirt

With all the paints on, it was time for the washes.
First it was time for a general layer and then I added some pin washes...
It still needs a few more layers and detailed little washes here and there but this is what they look like now.


Sunday, 27 March 2016

New Rally Pawn paints and decals

This guy is coming along pretty nicely. Paints and decals are on, and both he and the Camel  are now ready for stains and washes...
The photos speak for them selves I think but in short it went like this.
Black primer > yellow orange base layer > red and nato black top coat > steel details > chipping using a sponge in flat black > graphite for bare metal effect > clear coat > decal > clear coat (thin).

Enjoy! Drop me a line if you want to know more.

Cheers,
Martijn


Monday, 21 March 2016

Figure painting tutorial of sorts.

Ok some guys on Instagram asked me to explain the process I go through painting figures a little more in-depth. So here's a step by step. I'm still trying to figure out who I can get some video of it, but until then all I've got is stills...

Hope it helps and you can leave any questions in the comments. 

So let's go!
Step 1. First off: the paints and the tools. 

I always use Tamiya acrylics but it should be just about the same process with any other brand of acrylics. Not sure about lacquers to be honest...
Anyway these are the colours I'm using. 


For the tools:
A number 00,  number 0 and a number 1 brush and a toothpick or as in this case a wooden 'sate' skewer 


Step 2. Base paint. 
I use Tamiya grey base paint, no specific reason I always use a base coat. It makes the paints stick better and the grey is nice and neutral. 


Step 3. With the number 1 brush I put on a base colour of a mix of red, orange and pink. It should be a reddish orange and it functions as, well as a base. 


Step 4. Layering
On the base coat I start layering thin coats of the skin tones using the number 0 brush.
Which is basically the Tamiya Flesh tone mixed with the tiny amounts of Flat Red for the redder parts (like the nose, cheeks and around the eyes) and mix in a tiny bit of Medium Grey for the jaw and upper lip to suggest beard stubble. Keep it subtle!

I thin the paints with water. This is a little tricky and might take some trial and error to get right, but I want the paint thin enough to be transparent but it shouldn't be too runny or it will run in all the creases and ruin the detail of the mold... remember if it all goes to shit, just dip the thing in thinner and start over.


Step 5. The white of his eyes!
I think this is the most common way to do eyes at this scale. The trick is basically to put the white on kind of sloppy. Not to worry about going outside the lines and then cleaning it up later. 


Step 6. The pupils. 
For this I use the toothpick. I've seen guy elsewhere on the interwebs use a brush for this and I've tried... but I just can't do it. 
I first put in a dot of brown and then a dot of flat black on top of that. It's just to get a suggestion of some colour happening in there as the scale is too small for actual irises and pupils.

When using the toothpick make sure there's no droplet on the end of it. The wood should be absorbent enough (if that's the right word) to hold enough paint after you take off the excess paint. 

Again the pain will go over the eye-lids here. Don't worry about it, we'll clean that up later. Focus on making the guy look straight... or cross-eyed, however you want them to look. 


Step 7. A face lift.
Now it's time to clean up the eyes. 
With a number 00 brush I carefully touch up the eye lids. It can be hard to see now but you can get pretty close to the eye-ball so to speak. Here again the thinning of the paint is pretty essential. Too dry with make it lumpy, to thin might make it 'flood' the eye. It can be slightly thicker than before but it still needs to flow a little... again: trail and error. No simple trick here (even weather conditions can effect this), sorry. 

I also touched up the guys eyebrows with a mix of dark brown and flesh tone. I find it works better when you keep the eyebrows subtle. You could make the eye-brows heavier then here, but always build the colour up it thin layers so that there's more flesh tone mixed in at the ends... This suggests a thinning out of the hair, so avoiding "the caterpillar effect".

Also done did the lips with a mix of the Flesh and Flat Red. 


Step 8. The hood
No tricks here, just put some paint on the hood and be careful not to get paint on the face.


Step 9. Pin wash.
With all the acrylics done I hit it with a layer of glossy clear coat. And add some pin washes. 
I use oils for this, thinned with odourless terpenoid. For the face (especially around the eyes, in the eye lids,  the nostrils and the mouth eye use a mix of dark crimson and a lighter red I forgot the name 
off sorry and some ochre. And for the edge of the hood and nose holes I mix a little black in there too.

Also did the seams on the hood, and I think that's about it.  


I think the whole process took me about 30 minutes, including drying time.

So I hope this kind of clarifies how I go about it. Any questions, let me know. 

Thanks for looking!

Cheers,
Martijn