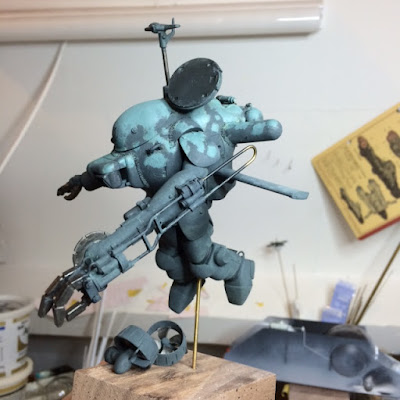
With all the work on the AG Chopper I had to put the Sea Pig build on the back burner for a bit. But I needed to step back from the scratch build for a bit so I had a chance to do some work on it again and maybe even finish it...
Any when I last left it the build was done and the base paint was on so I could get to the paints... I had been thinking about it for a while... couldn't really make a decision other than that I wanted it kind of blueish greenish and dark.... So I just dove dove in an started it... the scheme kind of developed as I wat putting it on.
I wanted to paint on a simple camo, giving the impression of light coming from above....
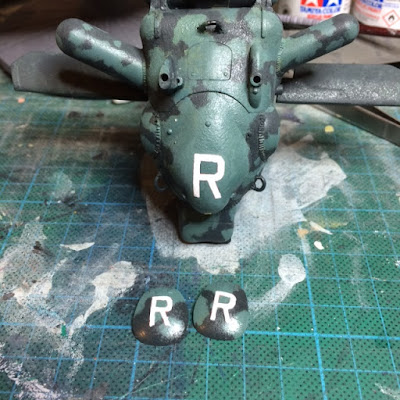
At this point I did have the smarts to start thinking about the decals (the box art model is white and grey and so most of the decals are black... this wouldn't show up very well on this scheme) But I noticed the big marking letters were only in red, black and gold. So I put on the red Rs on the top hatch and the shoulder plates and painted them over in white....
When this was done, I painted some details (metal parts and stuff) and then added some wear and tear in the form of some paint chips and some dulling of the paint here and there... Nothing too heavy this time.
I liked the camo as it was and the painted on chips looked pretty good... so it was time for the decals.
As I was putting the decals on (sourcing a many white replacements for all the dark coloured one son the decals sheet that came with the kit) I noticed something was missing... it needed something more. The thing was a little boring...
So I decided to paint on some more accents... yellow ones in fact.
Something went a bit weird with the yellow paint as I was putting it one.. It was a mix of Tamiya Lemon Yellow and Orange, and i had put down some masks and some liquid latex (for a chipping effect) but the paint reacted a little weird... to something. It went all flakey.
But I actually didn't mind it. It gave it a nice weathered look...
Likewise with the coat of the clear varnish I put on in prep for the decals... it didn't dry up smooth, but kind of pearly (you could still see the tiny individual droplets) but again this made for a really interesting texture. Especially for a submarine vehicle. So I wasn't too worried about it.
Anyway this is it with all the decals on... next up washes and stains.
Thanks for looking!
Cheers,
Martijn


