Sunday, 4 January 2015

Snake Eye Decals

The decals are on. I had to source most them from other kit's decal sheet as most of the Snake Eye ones are a dark grey... useless on this red one (especially after I'm done putting the washes on).

It's very shiny from the gloss varnish I put on for the decals to stick better (less chance of silvering) and to help the oil washes (next up) to flow into the various nooks and crannies.

That's all for now.


Friday, 2 January 2015

Snake Eye Base Paints Done

This is this is the base paints done.

I added a last layer of lighter orange reds and some white banding.

Usually you don't see this strong banding on the Mercenary machines but I'll be using decals from Strahl kits. So the back story is that this is a captured Mercenary machine, repainted and deployed in some Mars sabotage mission... hey it's called styrene DREAMS for a reason.

Anyway, I added white banding and next up will be the decals (really this time).


Sunday, 28 December 2014

Snake Eye Mars Mission

Quick update on the paint.
As promised less words, more pics...

Base paints are done apart from white banding and some details. Than decals.
Also did the cockpit but forgot to take pics sorry.

Over and out.

Martijn

ps: I used Tamiya Desert Yellow, Flat Red and Orange for the main body. Gunmetal Black (for thrusters), Rubber Black and Nato Black for hands and joints.


Saturday, 27 December 2014

Snake Eye

It's been a while since I've posted anything and I do apologise to both of my readers, but it's because of my most recent build really...
The title being the big fat spoiler; I'm working on a Snake Eye.

Now I bought this kit quite a while ago (at least a year ago), and it had sat on my shelf all this while. After finishing my last build I wanted something quick and simple to build. I had already ordered a couple of new kits (most notably a couple of Sea Pigs), my hand were itching for so i thought I'd just do thing in wait for the to arrive from Japan.

And well when I started it the build went well enough, but as the build progressed I realised I found it a little boring. The white "NASA" design the modest gun. I wanted to make a bit more bad-ass.
So to make my point most of this time was lost on trying to think of a way to make this guy a little less clean-cut.
In the meantime the Seapigs had arrived (plus an Oskar and a MK44 White Knight), but my bench isn't big enough to handle two build at the same time... especially not with my propensity for chaos.

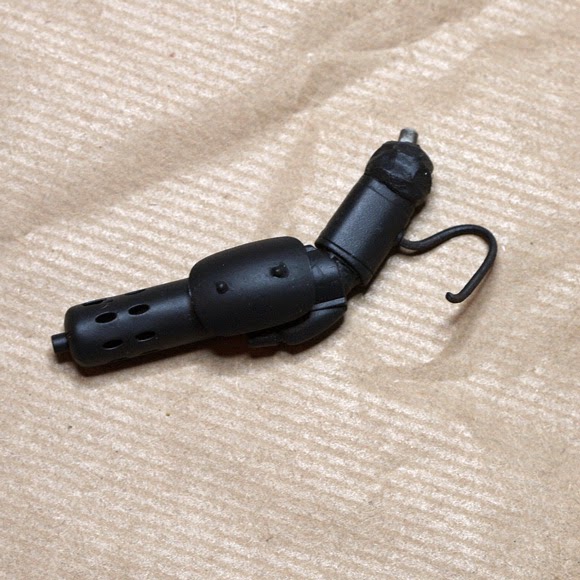
Anyway I assembled the guy and scratched him a more hefty piece of weaponry.
I'll let you guess what I used for the gun.

I shot the whole thing with Vallejo dark grey primer.... and I wish I hadn't. Again.
I know I've complained about it myself and there is a Dutch saying that not even a donkey is generally not stupid enough to hit its head against the same rock twice... but I got this tip (about using a blowdryer to cure it after applying it) and I still had almost a whole bottle of the stuff plus I'm cheap so I didnt' want ot chuck it... so I sprayed it on.
Anyway this shit can't take the lightest of hits without coming clean off. It's got no teeth at all. Hate it, will never ever use it again (really this time).

Anyway After the primer I decided I would send this thing to mars instead of the moon. So the ground work was layed for paint scheme befitting said planet...

Anyway here are some pics. Sorry for the text to pic ratio being so utterly boring.

More pics next time.

Cheers,
Martijn.


Friday, 7 November 2014

Küster & Friedrich Finished

Well that's a wrap!

I ended up giving it two sludge washes, one brown/black and one dark green.

With a layer of green spatters, a brown-black pin wash and a second layer of light brown spatters in between
I finished it off with a wash of the Vallejo ready made "desert sand wash". First time I used it, and it worked quite well.

When applying the washes and the dirt I tried to approximate a more natural distribution, so the lower half of the Kuster and lower 2 thirds of the Friedrich have more dirt then the top parts. Trying to keep the dirt line at the same hight off the ground on both...

Then I put on the final matt clear coat after which I added some gloss varnish details (to mimic oils spills) and put some graphite on the the bare metal parts and the engine...

Here's an overkill of pictures.

Hope you like it, feel free to leave a comment either way.